
How to Import Data into your Heroku PostgreSQL Database From Your Local PostgreSQL Database
Creating a Dump File and Importing Data into a Heroku PostgreSQL Database


Introduction
Oftentimes, you will need to migrate data from one PostgreSQL database to another. Importing data into your Heroku PostgreSQL database can be done easily with a few steps.
The Heroku PG Backups is a tool that you can use to export to and import from external PostgreSQL databases. In completing this post, you will learn how to use the PG Backup tool to import data into your Heroku PostgreSQL database from your local PostgreSQL database.
Prerequisites
It is important to note the following before continuing with this post:
- You should have an application already running on Heroku. You can visit this resource to learn how to deploy your applications to Heroku.
- You should have the Heroku Postgres-Addon added to your application. You can also visit this resource to learn about Heroku PostgreSQL-Addon and the available plans.
- You should have an AWS (Amazon Web Service) account. You can create a free account by clicking on this link.
- You should have the AWS CLI (Amazon WEb Service Command Line Interface) installed on your computer. This resource explains how to download the AWS CLI for your Linux, Mac or Windows machine.
- You should have PostgreSQL installed on your computer, and you must have data in your local PostgreSQL database that you want to import into a Heroku PostgreSQL database. This resource provides information on how to install PostgreSQL on your local machine
Getting Started
The process of importing data from your local PostgreSQL to your Heroku PostgreSQL Database is divided into the following processes:
- Create the dump file.
- Upload your dump file into an Amazon S3 Bucket.
- Import your dump file to a Heroku PostgreSQL Database.
How to create a database dump file
Dumping is a database backup technique. During dumping, a database dump file is created. A dump file is an SQL file that mirrors the state of the database at the time when the backup was done.
The dump file contains SQL commands, which when fed back to the same server as the database from which it was generated, restore the state of the database.
You can create a database dump file using the open-source pg_dump tool.
PostgreSQL provides pg_dump as a utility program. It is available for use once you install PostgreSQL on your computer. You can create a dump file with the pg dump tool using the pg_dump command as follows:
pg_dump -Fc --no-acl --no-owner -h localhost -U <postgres user account> --format=c <name of postgres database> > <name of dump file>.dump

To avoid being prompted for the password of the user account that you provided in the above command, you can export the password as a system variable using the following command:
export PGPASSWORD=<your postgreSQL user password>
In the screenshot above, the name of my local database is postgres, the name of my postgres user is also postgres, and
name of my dump file is redis-rate-limiter.
Notice the
--format=cpart of the above command. This creates the dump file in a format that can be restored bypg restoreutility when trying to restore the database state (thepg restoreutility restores the dump file to a target database using the specified format.) If the--format=ccommand is not used, the dump file created bypg dumpcan be read as text files. Failure to attach the--format=ccommand results in the following error when you try to do the final restoration withpg restore:
pg_restore: error: did not find magic string in file header
After creating your dump file, you can now upload your dump file to an Amazon s3 Bucket.
How to upload your dump file into an Amazon s3 Bucket
To follow the steps that are about to be described, you must first have an AWS account, if you do not have an AWS account, you can create one here
To upload to an s3 Bucket, you can follow the steps listed below:
- Login to your AWS console. This yields the following screen:
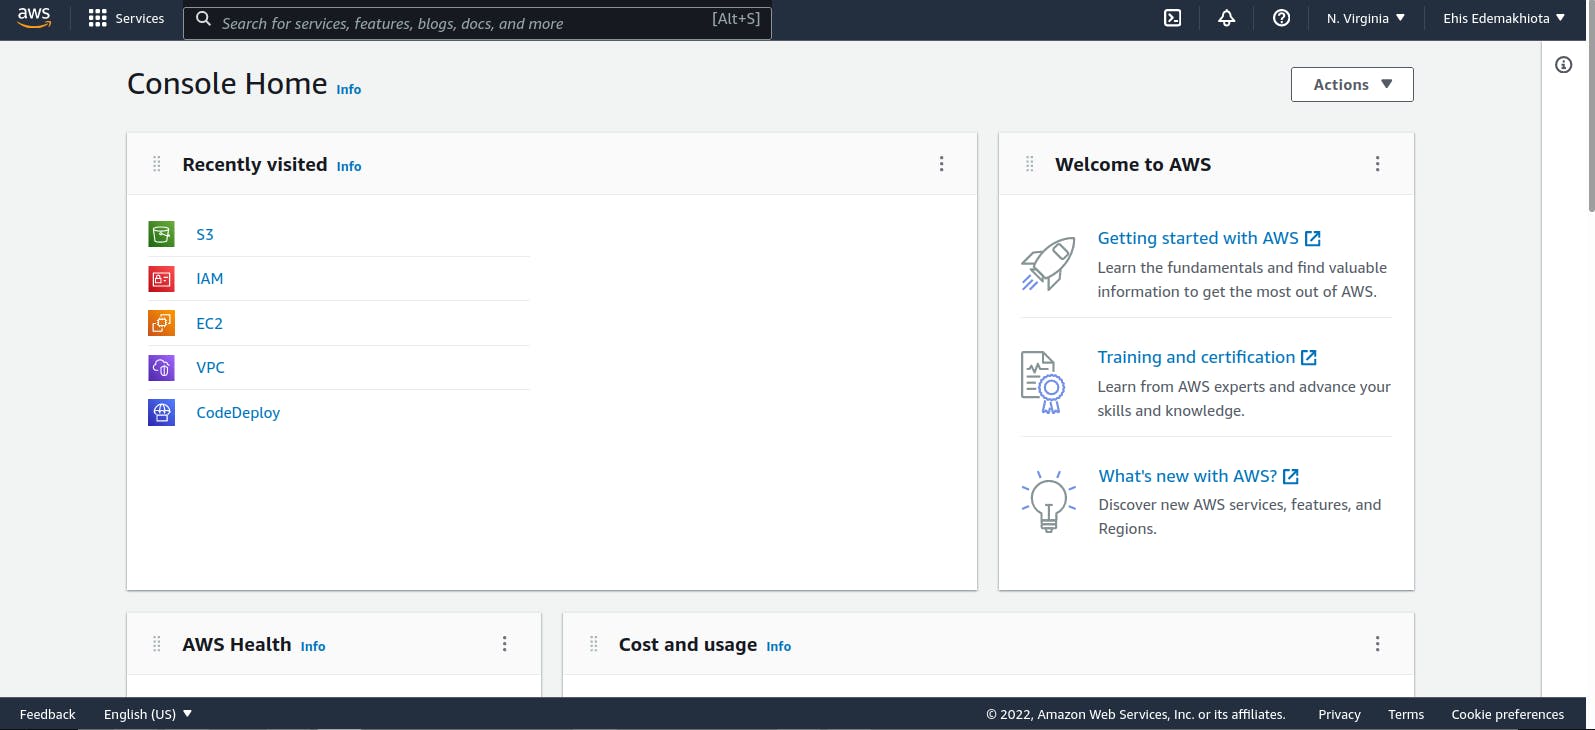
- Select the s3 option, this yields a screen that displays all the buckets currently on your account.
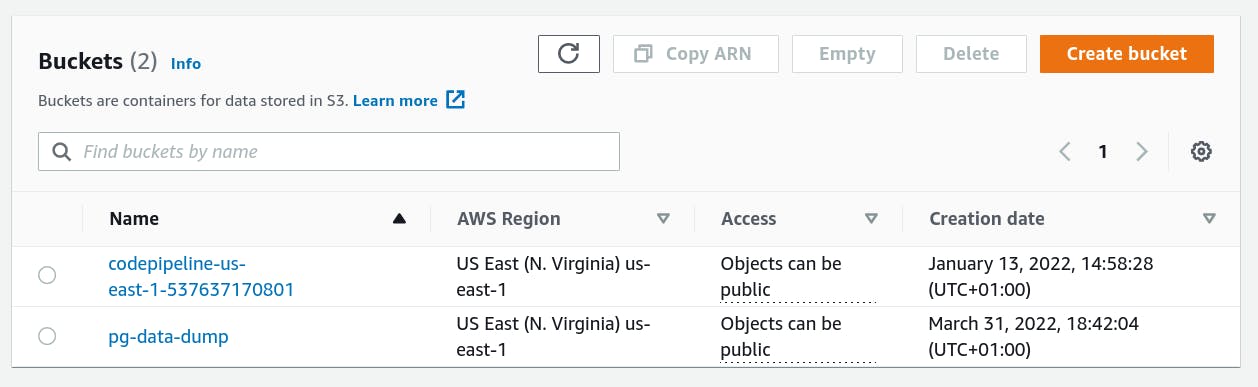
- To create a new bucket, click on the "Create Bucket" button. This leads to a form where you:
- add the name of the bucket under the "Bucket name" field.

- select the AWS Region.
- uncheck the "Block all public access" checkbox.
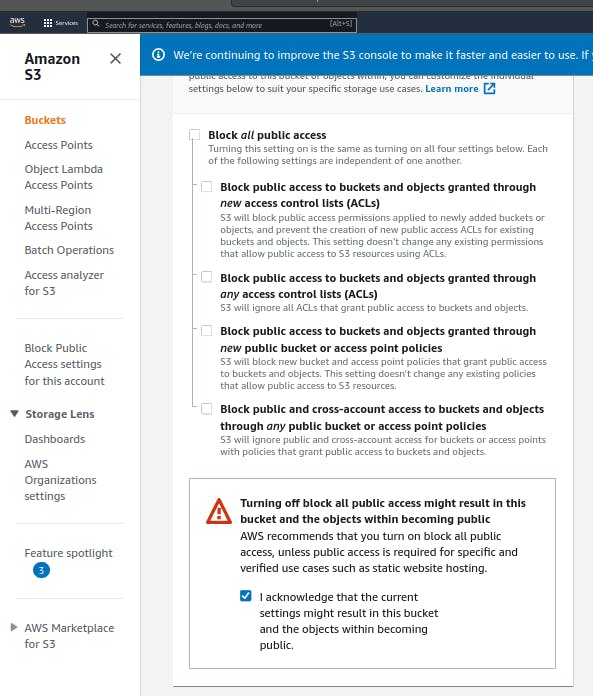
- finally, click on the "Create Bucket" button at the base of the form.
- add the name of the bucket under the "Bucket name" field.
- The new bucket that you created is now added to the list of buckets on your account. Select the new bucket, and click on the "Upload" button.
Choose the "Add Files" option and then navigate to the directory where the dump file is stored on your computer.

- After adding the dump file, click on the "Upload" button at the base of your screen.

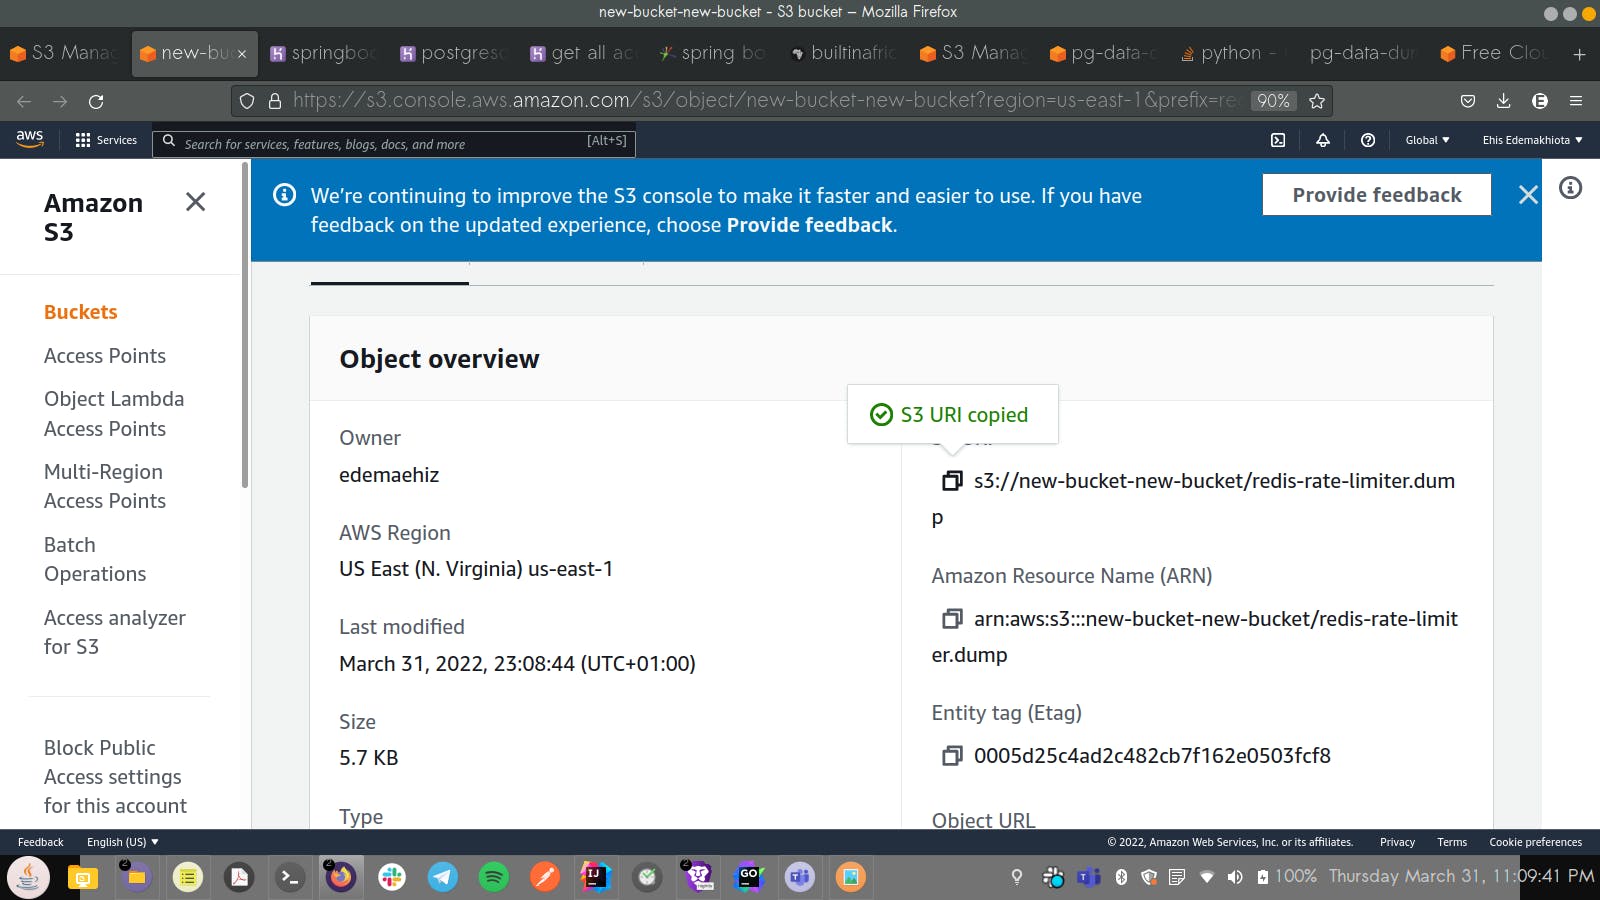
- After the dump file has been uploaded, click on it and this should direct you to a screen from which you can copy your s3 URI(Uniform Resource Identifier)
Now that you have successfully created and uploaded to an s3 Bucket, the next thing that you want to do now is to actually restore your dump file to a Heroku PostgreSQL Database.
How to Import your dump file to a Heroku PostgreSQL Database.
To import your dump file into a Heroku PostgreSQL Database:
- First, you need to create a signed URL for your newly created s3 bucket using the following command:
aws s3 presign <your s3 URI>

For this command to work you must first install the AWS CLI. This resource gives useful information on how to download and install the AWS CLI whether you are on a Mac, a Linux or a Windows computer.
- After generating your signed URL, you can now run the heroku
pg:backups:restorecommand as follows:heroku pg:backups:restore '<your s3 signed URL>' DATABASE_URL -a <the name of your heroku application>

DATABASE_URL represents a config variable stored in your Heroku PostgreSQL database. It is usually in the form:
postgres://wgqnunlXXXXXXX:54aac798a088c29730XXXXXXXXXXXXXXXXXXXXXXXXXXXXXXXXXXXXXXXXXXXXXX@ec2-18-214-XXX-XXX.compute-1.amazonaws.com:5432/d32h4ffXXXXXXX.
You can check that you have a Heroku PostgreSQL-Addon attached to your Heroku app by running the heroku addons command on your terminal.
If you have the Heroku PostgreSQL Database as an add-on to your Heroku application, you can view your database config variables by running the heroku config command on your terminal.
In the
heroku pg:backups:restore '<your s3 signed URL>' DATABASE_URL -a <the name of your heroku application>command, make sure that you specify the name of your Heroku application after the-aflag. Failure to do this yields the following error:Error: Missing required flag: -a, --app APP app to run command against See more help with --helpIt is also important to note that your signed URL should be enclosed within single quotes ('') if you are using a Linux or a Mac computer and double quotes ("") if you are using a Windows computer. This is because your signed URL may contain characters that may be flagged as invalid characters on your terminal.
- Enter the name of your Heroku application in the CLI as a confirmation that you want to perform a restore on the Heroku Postgres Database added to that application.
-After entering the name of your Heroku application, Heroku completes the restore and responds with the following message on your CLI.
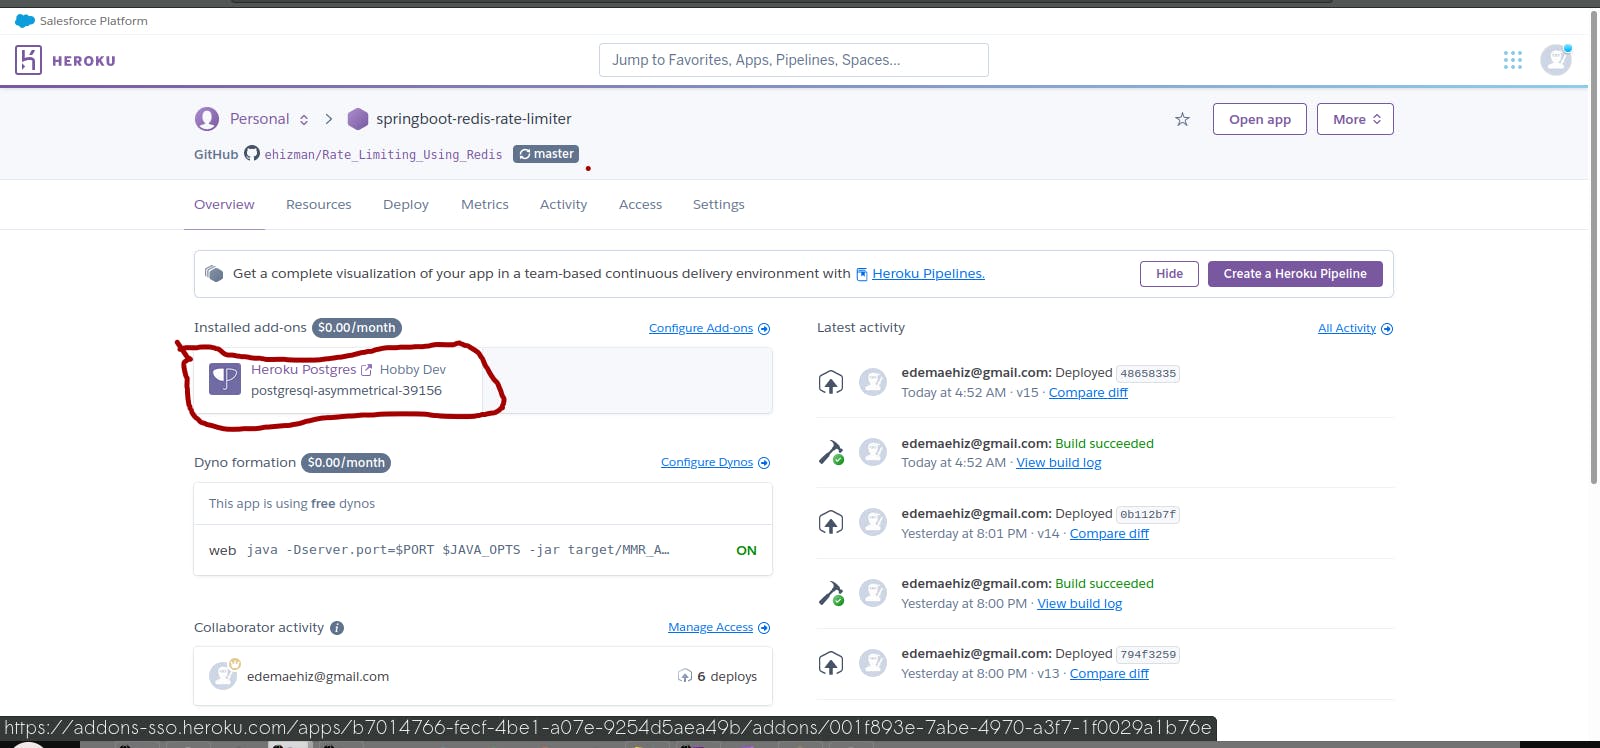
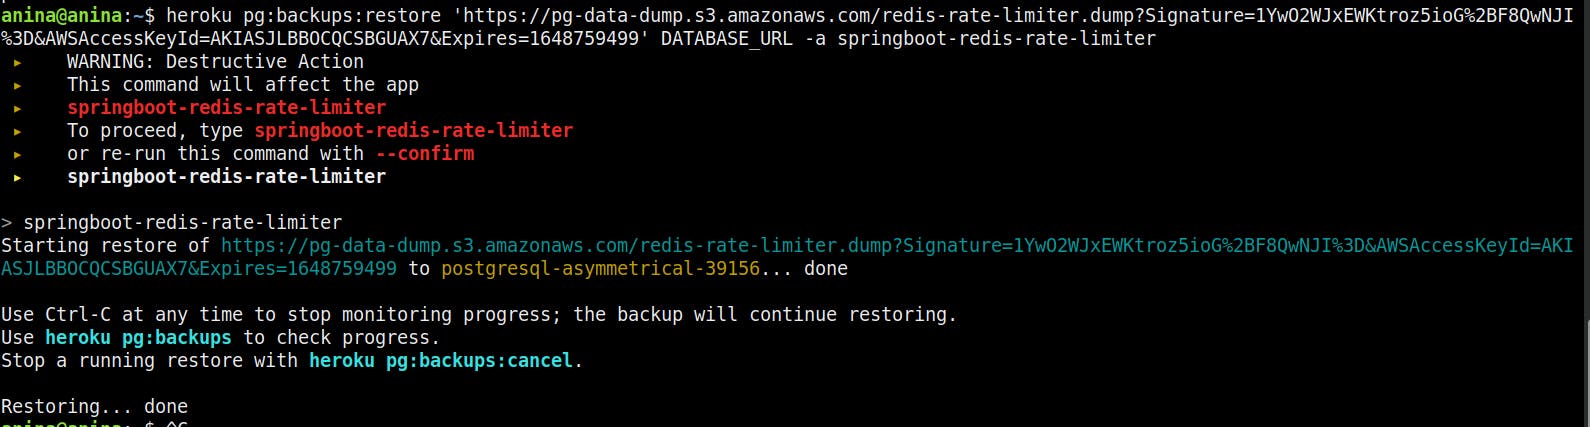 You can now check your Heroku PostgreSQL Dashboard to confirm that your import has indeed happened.

Now, you can return to your AWS account and delete the s3 bucket which you created. This is a precaution since you did not block public access to the bucket. The dump file in the bucket is no longer needed since you have successfully migrated your data to Heroku PostgreSQL.
Conclusion
Importing data into your Heroku PostgreSQL database can be done easily with a few steps. I hope that you enjoyed the tutorial and learnt something new too. I encourage you to make comments on the article. This will help me write more valuable content.
You can follow me on Twitter at @ehizman and also LinkedIn. I love sharing my knowledge through writing and I look forward to hearing from you.